Plastering is the process of applying plaster to walls, ceilings, or other surfaces in order to create a smooth and even finish. The mastery of plastering is an invaluable skill for DIY enthusiasts. You can transform the shabbiest walls into a smooth canvas, ready for the walls of your dreams! In this step-by-step guide we help you navigate this rewarding skill.
Step 1: Preparation
Have you got your tools to hand? Your toolkit should contain the following:
- 3 x buckets (1 for clean water to add to the mix, 1 for mixing, 1 for water to clean tools)
- Safety glasses & gloves
- PVA + brushes
- Mixer (paddle mixer or drill with mixer attachment)
- A trowel for application
- A hand board/ plastering hawk (used for transporting plaster from the bucket to the wall you are working on)
- Fine / medium sponge float
- Fine-grit sandpaper
- Scrubbing brush for cleaning tools
- Water spray
- A ladder
Note that the specific tools you need may vary depending on the type of plastering project you are undertaking.
Before you begin plastering, ensure your work area is clean and free from dust. Ensure that all old wallpaper or loose paint has been thoroughly stripped, and any existing cracks or holes filled in. Once you’ve done this, it’s a good idea to apply a coat of PVA (Polyvinyl Acetate) to ensure the plaster adheres to the wall properly (ideally leave to dry overnight in a well ventilated room).
Step 2: Mixing the Plaster
Any skilled plasterer will tell you that for a successful plaster job, the mix is the most important thing. A good plaster ratio is a 1:1 mix with clean, cold water. Gradually add the plaster to the water in the bucket, stirring as you go, until you achieve a creamy, lump-free consistency. It’s critical to follow the manufacturer’s instructions and avoid over-mixing, which can cause your plaster to dry too quickly.
Step 3: Applying the Plaster
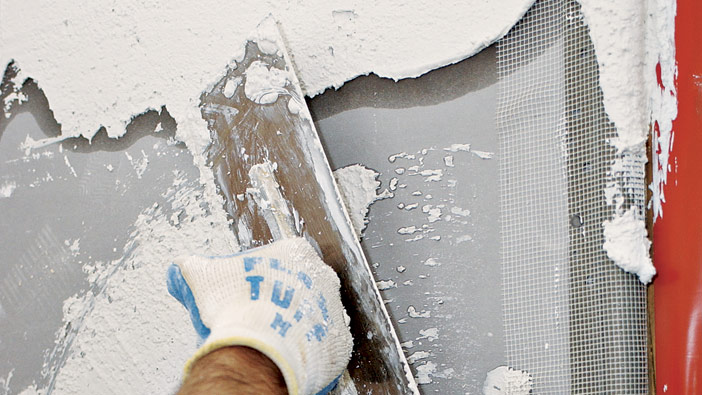
Using a trowel, apply a thin layer of plaster to your wall, working from the top down. Spread the plaster in smooth, upward strokes, maintaining a consistent thickness across the wall. This might feel a bit challenging at first, but with patience and practice, your technique will improve.
Step 4: Smoothing the Plaster
Once your wall is covered, wait for the plaster to set slightly. When it’s firm but still damp, you can begin to smooth it out. Hold your trowel at a slight angle and run it across the wall, removing any surplus plaster, and manoeuvring the trowel to create a smooth and consistent surface. You can also fill in any small uncovered areas.
Step 5: Sponge Float
To bring everything together, a fine sponge float is the ideal tool for smoothing plaster. Finely mist the wall with your water spray and make sure you have enough water on the wall, you don’t want your float to drag on the surface. Keep your float flat to the wall and it should glide over the wall smoothing everything out.
Step 6: Flattening the Plaster
After you have used the sponge float, use the trowel to remove any indentations that the sponge has left. This is known as ‘trowelling out’. Remember to clean your trowel periodically using the clean water bucket.
Step 7: Drying and Sanding
Allow the plaster to dry thoroughly, which could take anywhere from a couple of days to a few weeks, depending on the climate and type of materials used. Once completely dry, lightly sand the wall using fine-grit sandpaper to achieve a flawless finish.
Plastering is a craft that requires a degree of skill and dexterity. Remember, practice makes perfect, but soon enough, you’ll be transforming spaces with the proficiency of a seasoned plasterer! In the grand tradition of DIY, roll up your sleeves, and get to creating your beautifully smooth walls!


